

Discover the Kitchen Tool Everyone Is Raving About!
- • Precision Engineered: Sharp blade with durable craftsmanship.
- • Comfort First: Ergonomic design for effortless slicing.
- • Stylish & Strong: Elegant wood handle meets stainless steel strength.
- • Risk-Free Pick: Thousands of happy home chefs can’t be wrong.
- • Today’s Deal: Just $29.95 instead of $99.85 — limited-time offer!
This post may include affiliate links — learn more here .
Introduction
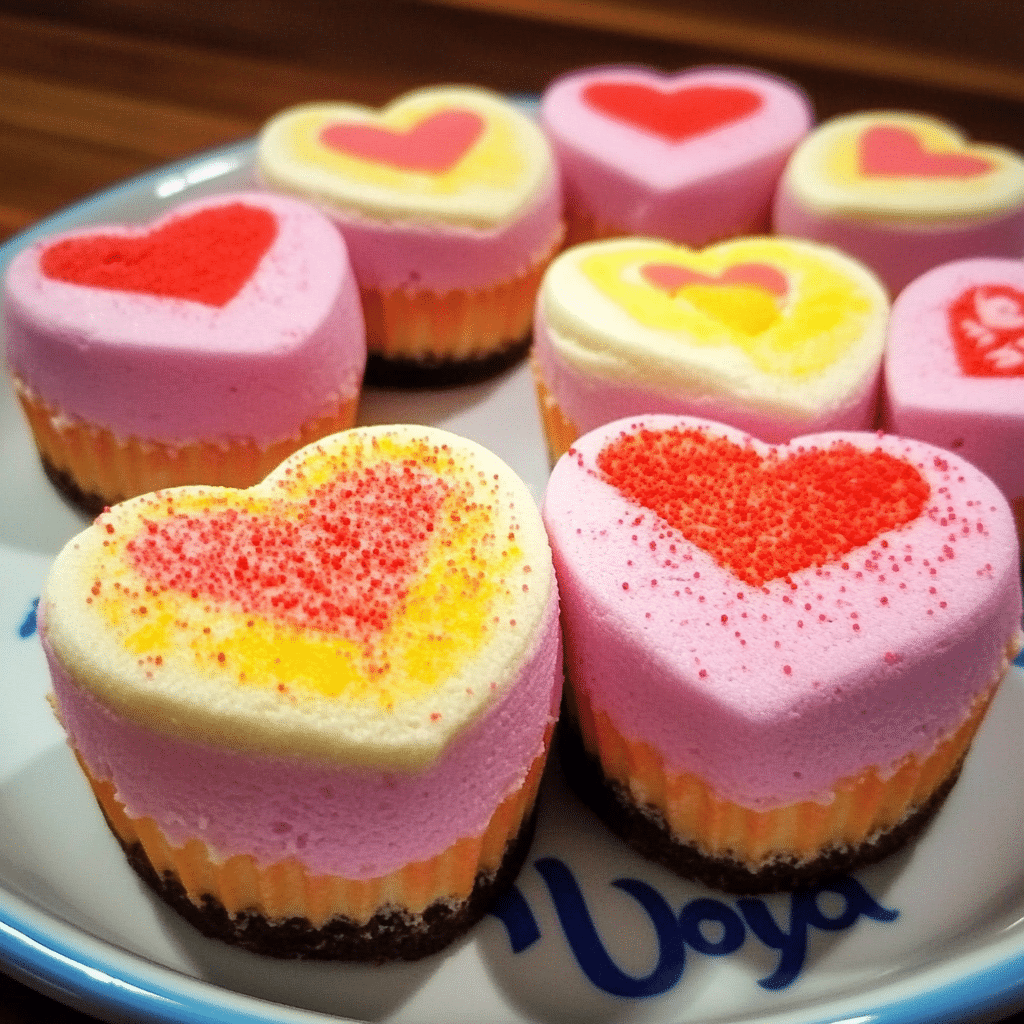
Conversation Heart Mini Cheesecakes are a fun and festive way to enjoy the creamy, indulgent flavor of cheesecake with a playful twist. These bite-sized treats feature a smooth, rich cheesecake filling atop a crunchy graham cracker crust, all decorated with colorful conversation heart candies for the perfect touch of sweetness and whimsy. Whether for Valentine’s Day, a special occasion, or just because, these mini cheesecakes are sure to delight both kids and adults alike. With their vibrant colors and fun, sweet messages, they are as charming as they are delicious!
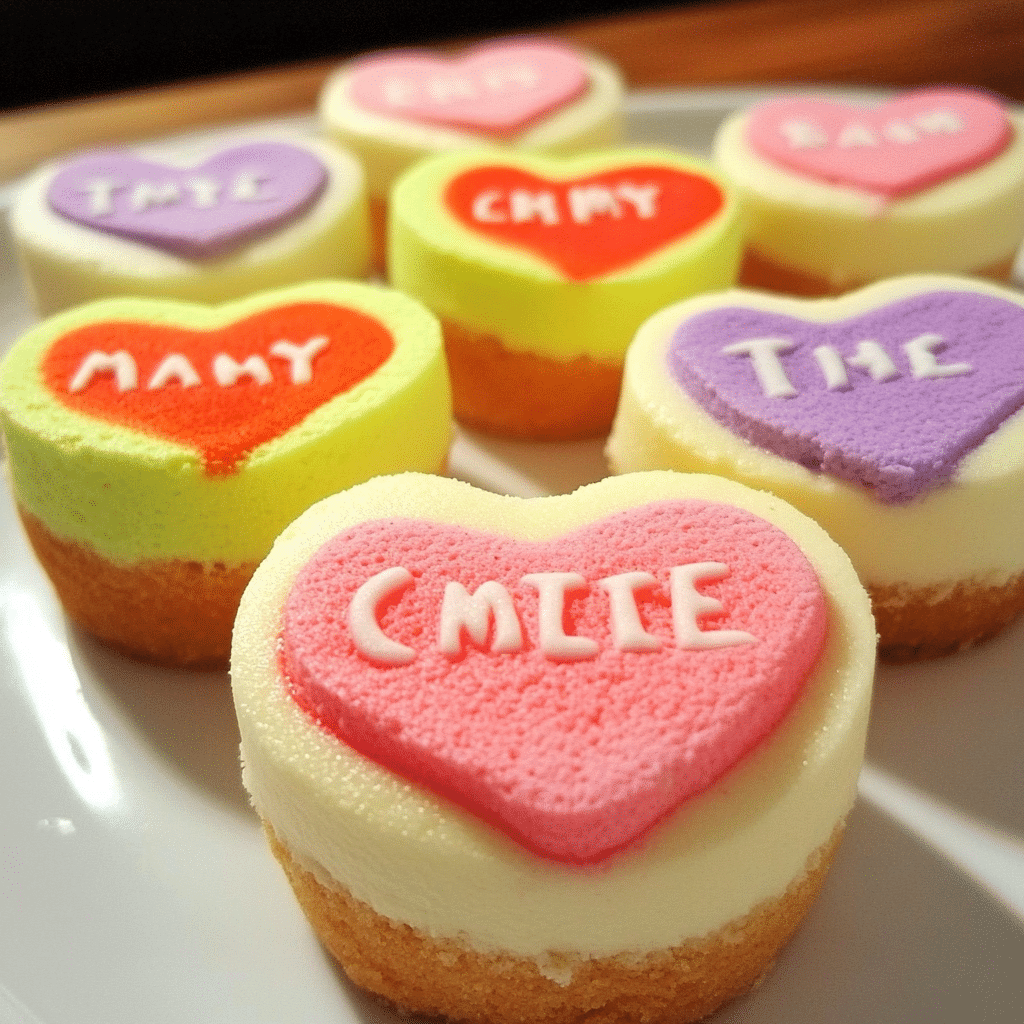
I remember the first time I made these for a Valentine’s Day celebration. The mini cheesecakes looked so festive, with the pastel-colored conversation hearts making them extra special. Everyone loved the combination of the creamy cheesecake and the crunchy crust, and the sweet little messages on the hearts added a playful touch that made them even more fun. What’s great about these mini cheesecakes is how easy they are to customize—you can use any candy you like or even try different toppings like whipped cream or fruit. Whether you’re making them for a holiday or just because, they’re a guaranteed crowd-pleaser!
Perfect for:
- Valentine’s Day
- Birthday parties
- Sweet treats for kids
- Dessert tables
- Celebrating special occasions
Why You’ll Love This Recipe
Here’s why Conversation Heart Mini Cheesecakes are bound to become your go-to dessert:
- Fun and Festive: These mini cheesecakes are perfect for any celebration with their colorful, cute conversation heart candies.
- Individual Portions: Each cheesecake is served in its own mini crust, making them easy to serve and perfect for portion control.
- Deliciously Creamy: The cheesecake filling is rich and smooth, creating a satisfying and indulgent treat.
- Customizable Toppings: The conversation hearts can be personalized with any message or color, adding an extra fun touch for any occasion.
- No-Bake Option: You can skip the oven and chill these cheesecakes in the fridge, making them a no-fuss dessert option.
Preparation and Cooking Time
- Total Time: 4 hours (including chilling time)
- Preparation Time: 25 minutes
- Chilling Time: 3 hours
- Servings: 12 mini cheesecakes
- Calories per serving: Approximately 250-300 calories
- Key Nutrients: Protein: 6g, Carbs: 28g, Fat: 18g
Ingredients
Gather these ingredients to make your Conversation Heart Mini Cheesecakes:
For the Crust:
- 1 ½ cups graham cracker crumbs
- 2 tablespoons granulated sugar
- 6 tablespoons unsalted butter, melted
For the Filling:
- 16 oz cream cheese, softened
- ½ cup granulated sugar
- 2 teaspoons vanilla extract
- 2 large eggs
- 1 cup sour cream
- 1 tablespoon all-purpose flour
For the Topping:
- Conversation heart candies (for decoration)
Ingredient Highlights
- Cream Cheese: Provides the signature creamy, smooth texture essential for cheesecake.
- Graham Cracker Crumbs: These make the perfect buttery crust that adds a delicious crunch.
- Sour Cream: Enhances the cheesecake’s flavor, adding richness and tanginess.
- Vanilla Extract: Adds depth of flavor to the creamy filling.
- Conversation Hearts: Fun, decorative candies that add a festive touch and playful sweetness to the cheesecake.
Step-by-Step
 Instructions
Here’s how to make Conversation Heart Mini Cheesecakes:
Prepare the Crust:
- Mix the Crust Ingredients: In a medium bowl, combine the graham cracker crumbs, sugar, and melted butter. Stir until the mixture is fully combined and the crumbs are evenly coated.
- Press the Crust into the Muffin Tin: Spoon about 1 tablespoon of the crust mixture into the bottom of each cup of a 12-cup muffin tin (lined with paper liners). Press down firmly to form an even layer. Refrigerate while you prepare the filling.
Prepare the Filling:
- Beat the Cream Cheese and Sugar: In a large bowl, beat the softened cream cheese and granulated sugar together using an electric mixer until smooth and creamy.
- Add the Eggs and Vanilla: Add the eggs, one at a time, beating well after each addition. Stir in the vanilla extract.
- Add the Sour Cream and Flour: Mix in the sour cream and flour until well combined. The batter should be smooth and creamy.
- Spoon the Filling into the Cups: Spoon the cheesecake mixture evenly over the prepared crusts in the muffin tin, filling each cup to about ¾ full.
Bake the Mini Cheesecakes:
- Bake the Cheesecakes: Preheat your oven to 325°F (160°C). Bake for 20-25 minutes, or until the centers are set but still slightly jiggly. The edges should be firm.
- Cool and Chill: Let the mini cheesecakes cool in the pan for 10 minutes. Then, transfer to the fridge to chill for at least 3 hours, or until fully set.
Serve and Garnish:
- Decorate with Conversation Hearts: Once the cheesecakes are chilled, top each one with a conversation heart candy or two. Arrange them in fun patterns or personalize the messages.
- Serve: Serve chilled for the best texture and flavor.
How to Serve
- For Valentine’s Day: These mini cheesecakes are perfect for a romantic dinner or a fun treat to share with loved ones.
- At a Party: Serve these cheesecakes as part of a dessert table at birthday parties, baby showers, or any festive occasion.
- With Fresh Fruit: Serve alongside fresh berries like strawberries or raspberries to balance the sweetness of the cheesecake.
- For Kids: The colorful conversation hearts make these mini cheesecakes a big hit with children.
Additional Tips
- Soften the Cream Cheese: Be sure the cream cheese is softened for a smooth, creamy filling.
- Don’t Overmix: When adding the eggs, mix just until incorporated to avoid overworking the batter.
- Customize the Topping: You can mix up the conversation heart candies with other colorful candy toppings, like sprinkles or edible glitter, for different occasions.
- Use a Water Bath for Even Baking: To prevent cracks, you can bake the cheesecakes in a water bath by placing the muffin tin in a larger pan filled with hot water, ensuring even cooking.
- Double the Recipe: If you need more mini cheesecakes, simply double the recipe and use a larger muffin tin or more muffin cups.
Recipe Variations
Here are some variations to try with Conversation Heart Mini Cheesecakes:
- Strawberry Cheesecake Mini Cheesecakes: Swirl fresh strawberry puree into the filling for a fruity twist.
- Chocolate Mini Cheesecakes: Add melted chocolate to the cheesecake batter for a rich chocolate version.
- Lemon Cheesecake Mini Cheesecakes: Add lemon zest and a bit of lemon juice to the filling for a citrusy flavor.
- Red Velvet Cheesecake Mini Cheesecakes: Use red velvet cake crumbs for the crust and swirl in a bit of red velvet cake batter into the filling.
- Salted Caramel Cheesecake Mini Cheesecakes: Drizzle caramel sauce over the top before adding the conversation hearts for a sweet-salty twist.
- Pumpkin Spice Mini Cheesecakes: Add a dash of cinnamon, nutmeg, and pumpkin puree for a seasonal variation.
Freezing and Storage
- Freezing: These mini cheesecakes freeze well. Wrap them tightly in plastic wrap and store them in an airtight container for up to 2 months. Thaw in the refrigerator before serving.
- Storage: Store leftovers in the fridge for up to 5 days. Keep the conversation hearts separate until you’re ready to serve to maintain their freshness.
Special Equipment
Here are some special equipment items to make preparing your Conversation Heart Mini Cheesecakes easier:
- Electric Mixer: For smooth, creamy cheesecake filling.
- Muffin Tin: For baking the mini cheesecakes.
- Paper Liners: To easily remove the cheesecakes from the tin.
- Spatula: To smooth the cheesecake filling into each cup evenly.
FAQ Section
- Can I use a different type of crust?
Yes, you can use crushed Oreos or digestive biscuits for a different flavor profile. - Can I make these in advance?
Yes, you can make them up to 2 days ahead of time and keep them refrigerated. - Can I use store-bought cheesecake filling?
For a shortcut, you can use store-bought cheesecake filling, but homemade will have a richer taste. - Can I freeze these mini cheesecakes?
Yes, they freeze well. Just be sure to wrap them tightly before freezing.
Conversation Heart Mini Cheesecakes

- Prep Time: 25 minutes
- Total Time: 4 hours (including chilling time)
Ingredients
For the Crust:
- 1 ½ cups graham cracker crumbs
- 2 tablespoons granulated sugar
- 6 tablespoons unsalted butter, melted
For the Filling:
- 16 oz cream cheese, softened
- ½ cup granulated sugar
- 2 teaspoons vanilla extract
- 2 large eggs
- 1 cup sour cream
- 1 tablespoon all-purpose flour
For the Topping:
- Conversation heart candies (for decoration)
Instructions
Prepare the Crust:
- Mix the Crust Ingredients: In a medium bowl, combine the graham cracker crumbs, sugar, and melted butter. Stir until the mixture is fully combined and the crumbs are evenly coated.
- Press the Crust into the Muffin Tin: Spoon about 1 tablespoon of the crust mixture into the bottom of each cup of a 12-cup muffin tin (lined with paper liners). Press down firmly to form an even layer. Refrigerate while you prepare the filling.
Prepare the Filling:
- Beat the Cream Cheese and Sugar: In a large bowl, beat the softened cream cheese and granulated sugar together using an electric mixer until smooth and creamy.
- Add the Eggs and Vanilla: Add the eggs, one at a time, beating well after each addition. Stir in the vanilla extract.
- Add the Sour Cream and Flour: Mix in the sour cream and flour until well combined. The batter should be smooth and creamy.
- Spoon the Filling into the Cups: Spoon the cheesecake mixture evenly over the prepared crusts in the muffin tin, filling each cup to about ¾ full.
Bake the Mini Cheesecakes:
- Bake the Cheesecakes: Preheat your oven to 325°F (160°C). Bake for 20-25 minutes, or until the centers are set but still slightly jiggly. The edges should be firm.
- Cool and Chill: Let the mini cheesecakes cool in the pan for 10 minutes. Then, transfer to the fridge to chill for at least 3 hours, or until fully set.
Serve and Garnish:
- Decorate with Conversation Hearts: Once the cheesecakes are chilled, top each one with a conversation heart candy or two. Arrange them in fun patterns or personalize the messages.
- Serve: Serve chilled for the best texture and flavor.
Nutrition
- Serving Size: 12 mini cheesecakes
- Calories: 250-300
- Fat: 18g
- Carbohydrates: 28g
- Protein: 6g
Conclusion
Conversation Heart Mini Cheesecakes are the perfect dessert for adding a touch of fun and flavor to any celebration. With their creamy filling, crunchy crust, and playful candy toppings, they make a festive and irresistible treat that everyone will love. Whether you’re celebrating Valentine’s Day or any special occasion, these mini cheesecakes are sure to bring smiles to your guests’ faces and sweeten the day.
This recipe is as easy to prepare as it is delightful, making it a great choice for both casual get-togethers and festive events. The combination of rich cheesecake and the colorful, conversation heart candies creates a fun and eye-catching dessert that is sure to be the star of any occasion.
I’d love to see how your Conversation Heart Mini Cheesecakes turn out! Snap a photo, share it on social media, and don’t forget to tag me—I can’t wait to see your delicious creations. Enjoy every bite!