
Introduction
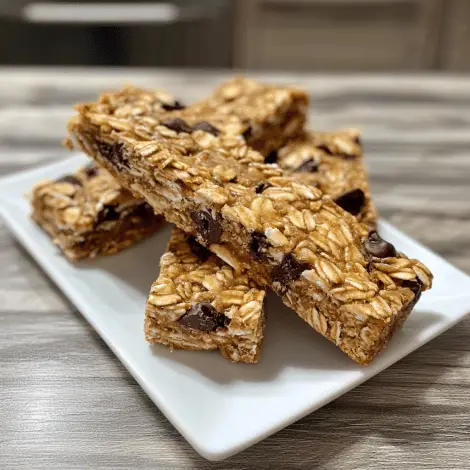
Homemade Granola Bars are a wholesome, customizable, and convenient snack, perfect for busy mornings, after-school energy boosts, or a healthy treat on the go. These bars combine oats, nuts, seeds, and natural sweeteners into a chewy, satisfying bite that’s both nutritious and delicious. By making them at home, you control the ingredients and can easily avoid added preservatives or unnecessary sugar. With endless variations, you can tweak these bars to suit your taste preferences, whether you prefer a nutty, fruity, or chocolatey flavor. Perfect for meal prep or an energy-packed snack, Homemade Granola Bars are sure to become a staple in your kitchen.
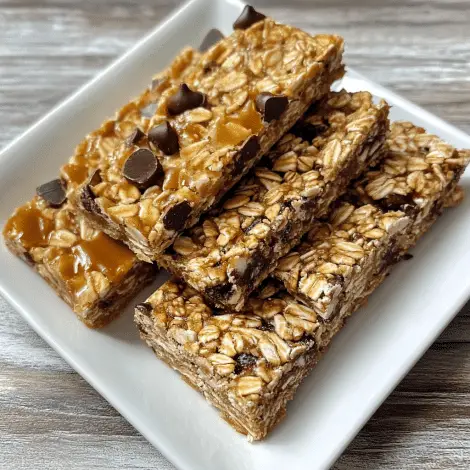
I remember the first time I made them for a busy morning when I needed something quick and filling before heading out the door. The aroma of toasted oats and nuts filled the house, and I couldn’t wait to try one. What’s great about homemade granola bars is how versatile they are—you can mix in your favorite nuts, seeds, dried fruits, or even a swirl of honey or peanut butter for extra flavor. For those who love a touch of sweetness, a few chocolate chips or drizzle of melted chocolate adds the perfect finishing touch.
These bars are surprisingly easy to make, too. With just a few simple ingredients and a little time in the oven, you can create a batch that lasts all week. Whether you’re looking to fuel up before a workout or need a grab-and-go snack for busy days, Homemade Granola Bars are always a hit!
Perfect for:
- Breakfast on the go
- Pre-workout snack
- Lunchbox fillers
- Road trips and travel
- Busy workdays
Why You’ll Love This Recipe
Here’s why Homemade Granola Bars will be a hit:
- Customizable Ingredients: Tailor the bars to your liking with your favorite nuts, seeds, or dried fruits.
- Wholesome Ingredients: Oats, honey, and nuts provide a nourishing snack that’s naturally sweetened.
- Easy to Make: With just a few simple steps, you can whip up a batch of these homemade bars.
- No Bake Option: Skip the oven and make these no-bake granola bars to save time.
- Great for Meal Prep: Make a batch ahead of time and have snacks ready for the week.
Preparation and Cooking Time
- Total Time: 2 hours (including chilling time)
- Preparation Time: 15 minutes
- Chilling Time: 1-2 hours
- Servings: 12 bars
- Calories per bar: Approximately 200-250 calories
- Key Nutrients: Protein: 5g, Carbs: 30g, Fat: 10g
Ingredients
For the Bars:
- 2 cups rolled oats
- 1 cup mixed nuts (almonds, cashews, walnuts, etc.), chopped
- ½ cup seeds (sunflower seeds, chia seeds, or pumpkin seeds)
- ½ cup dried fruit (raisins, cranberries, apricots, etc.), chopped
- ¼ cup honey or maple syrup
- ¼ cup nut butter (peanut butter, almond butter, or cashew butter)
- 1 tsp vanilla extract
- ¼ tsp salt
For the Binding:
- 2 tbsp coconut oil or olive oil
- 2 tbsp water
Ingredient Highlights
- Rolled Oats: The base of the bars, providing fiber and slow-releasing energy.
- Nuts and Seeds: Packed with healthy fats, protein, and nutrients for a satisfying snack.
- Dried Fruit: Adds natural sweetness and chewy texture, along with vitamins and antioxidants.
- Honey or Maple Syrup: Natural sweeteners that also help bind the ingredients together.
- Nut Butter: Provides healthy fats and acts as a binder, keeping the bars together.
Step-by-Step Instructions
Here’s how to make Homemade Granola Bars:
Prepare the Ingredients:
- Chop the Nuts and Fruit: Start by chopping your nuts and dried fruit into smaller, bite-sized pieces. Set them aside.
- Prepare the Wet Ingredients: In a small saucepan, combine the honey or maple syrup, nut butter, coconut oil, and vanilla extract. Heat over low-medium heat until melted and combined, stirring occasionally. Once smooth, remove from heat.
- Mix the Dry Ingredients: In a large mixing bowl, combine the rolled oats, chopped nuts, seeds, dried fruit, and salt. Stir until everything is evenly distributed.
Make the Bars:
- Combine Wet and Dry Ingredients: Pour the wet mixture into the dry ingredients and stir well until everything is evenly coated and sticky. If the mixture feels too dry, add a tablespoon or two of water to help bring it together.
- Press into the Pan: Line an 8×8-inch baking dish or a similar-sized square pan with parchment paper. Press the granola mixture firmly into the pan, making sure it’s compact and even. Use the back of a spoon or your hands to press it down tightly.
- Chill to Set: Place the pan in the fridge and chill for 1-2 hours, or until the bars are firm and set.
Serve and Slice:
- Slice into Bars: Once chilled and set, remove from the fridge and lift the granola block out of the pan using the parchment paper. Place it on a cutting board and slice into squares or bars.
- Serve and Enjoy: Enjoy immediately, or store the bars in an airtight container in the fridge for up to a week, or freeze for longer storage.
How to Serve
- For Breakfast: Pair with a smoothie or yogurt for a quick and healthy breakfast.
- As a Snack: Perfect for an afternoon snack to keep you energized.
- On the Go: Pack in your bag for travel or hiking to keep hunger at bay.
- For Lunchboxes: Ideal for kids’ lunches or to take to work.
- With a Drink: Pair with tea, coffee, or a glass of milk for a satisfying treat.
Additional Tips
- Add Chocolate Chips: For a chocolatey twist, add mini chocolate chips to the mixture.
- Use Different Nuts and Seeds: Experiment with different combinations based on your taste preferences.
- Make Them Vegan: Use maple syrup and a plant-based nut butter to make these bars fully vegan.
- For Extra Crunch: Toast the oats and nuts in the oven before mixing them for a crispier texture.
- Use a Larger Pan: For thinner bars, use a larger baking pan, but adjust the chilling time accordingly.
Recipe Variations
- Peanut Butter and Chocolate Granola Bars
- Almond and Coconut Granola Bars
- Cranberry Orange Granola Bars
- Banana Nut Granola Bars
- Apple Cinnamon Granola Bars
- Chocolate Chia Seed Granola Bars
- Maple Pecan Granola Bars
- Coconut and Cashew Granola Bars
- Pumpkin Spice Granola Bars
- Mixed Berry Granola Bars
Freezing and Storage
- Freezing: Wrap individual bars in parchment paper or plastic wrap and freeze for up to 2 months. Thaw before serving.
- Storage: Store bars in an airtight container in the fridge for up to 1 week.
Special Equipment
- Mixing bowls
- Small saucepan
- 8×8-inch baking dish or square pan
- Parchment paper
- Knife for slicing
FAQ Section
- Can I use any type of nut butter? Yes, peanut butter, almond butter, or cashew butter all work well.
- Can I add protein powder? Yes, add a scoop of protein powder to the wet mixture for an extra protein boost.
- Can I make these bars gluten-free? Yes, use certified gluten-free oats to make them gluten-free.
- How do I keep the bars from falling apart? Press the mixture firmly into the pan and chill thoroughly to help the bars set.
- Can I substitute dried fruit with fresh fruit? It’s best to use dried fruit, as fresh fruit may add too much moisture.
Conclusion
These Homemade Granola Bars are the ideal combination of wholesome ingredients and irresistible flavors, providing a satisfying and nutritious snack that keeps you fueled all day. With endless customization options to fit your preferences and dietary needs, they’re a versatile choice for anyone looking for a healthy, homemade treat.
Whether you’re enjoying them as a breakfast on the go, a midday snack, or an after-workout refuel, these granola bars are perfect for any occasion. Plus, they’re easy to make and full of goodness, so you can feel great about what you’re eating.
I’d love to see how your Homemade Granola Bars turn out! Snap a photo, share it on social media, and don’t forget to tag me—I can’t wait to see your delicious creations. Enjoy every bite!