


Discover the Kitchen Tool Everyone Is Raving About!
- • Precision Engineered: Sharp blade with durable craftsmanship.
- • Comfort First: Ergonomic design for effortless slicing.
- • Stylish & Strong: Elegant wood handle meets stainless steel strength.
- • Risk-Free Pick: Thousands of happy home chefs can’t be wrong.
- • Today’s Deal: Just $29.95 instead of $99.85 — limited-time offer!
This post may include affiliate links — learn more here .
Introduction
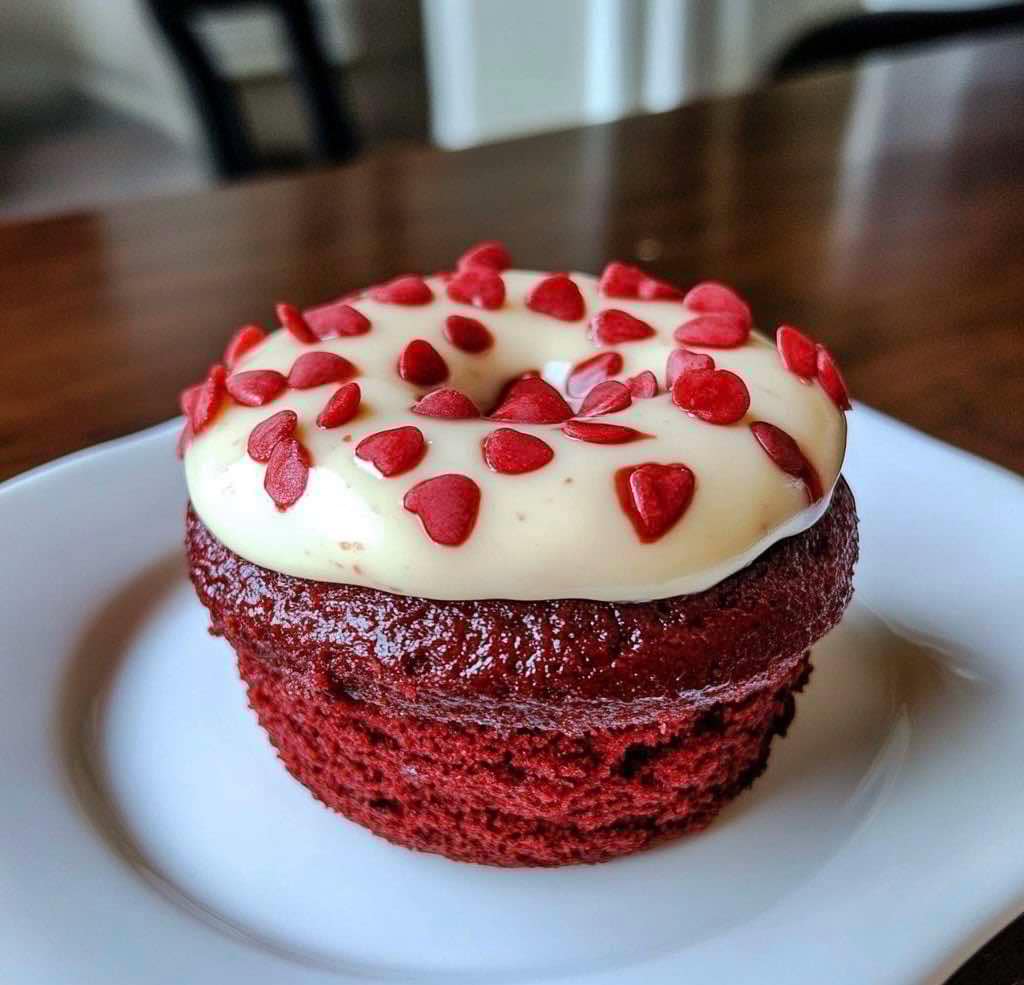
Red Velvet Reinvented is a bold, delicious take on the classic red velvet cake, offering all the indulgent flavors of the traditional dessert but with a fresh twist. This version combines rich red velvet cake layers with a creamy, smooth filling, creating a dessert that’s both visually stunning and incredibly satisfying. The delicate cocoa flavor of the cake is complemented by the tangy richness of the filling, making it a crowd-pleasing treat for any occasion. With its striking red hue and velvety texture, Red Velvet Reinvented is a showstopper that will elevate your next celebration or simply provide an indulgent experience any time you crave something special.
I remember the first time I made this for a special dinner gathering. The deep red color and smooth layers of the filling had everyone admiring the cake before they even took a bite. The combination of flavors—rich cocoa and tangy creaminess—was a hit with everyone at the table. It quickly became one of those desserts that people request for birthdays, anniversaries, and holidays. Whether for a celebratory event or just as a treat to enjoy, Red Velvet Reinvented is always a delightful choice!
Perfect for:
- Birthdays
- Anniversaries
- Holiday gatherings
- Special occasions
- Dessert trays
Why You’ll Love This Recipe
Here’s why Red Velvet Reinvented is sure to become a favorite:
- Classic Flavors with a Twist: The cake delivers all the delicious cocoa and vanilla notes of traditional red velvet, but with a fresh and modern take.
- Smooth and Creamy Filling: The creamy filling balances the richness of the cake, adding a perfect contrast to the tender layers.
- No Alcohol or Pork: This recipe is free from alcohol and pork, making it accessible for all dietary preferences.
- Perfectly Moist Cake: The red velvet cake is soft, moist, and full of flavor, making each bite a luxurious experience.
- Stunning Appearance: The vibrant red color makes it an eye-catching dessert, perfect for impressing guests at any event.
Preparation and Cooking Time
- Total Time: 2 hours (including cooling time)
- Preparation Time: 30 minutes
- Baking Time: 30-35 minutes
- Cooling Time: 1 hour
- Servings: 12 servings
- Calories per serving: Approximately 350-400 calories
- Key Nutrients: Protein: 5g, Carbs: 45g, Fat: 20g
Ingredients
Gather these ingredients to make your Red Velvet Reinvented:
For the Cake:
- 2 ½ cups all-purpose flour
- 1 ½ cups granulated sugar
- 2 teaspoons baking powder
- 1 teaspoon baking soda
- 1 teaspoon salt
- 1 tablespoon unsweetened cocoa powder
- 1 ½ cups vegetable oil
- 1 cup buttermilk (or substitute with milk + 1 tablespoon vinegar)
- 2 large eggs
- 2 tablespoons red food coloring (gel or liquid)
- 1 teaspoon vanilla extract
- 1 teaspoon white vinegar
For the Cream Cheese Filling:
- 8 oz cream cheese, softened
- 1 cup powdered sugar
- 1 teaspoon vanilla extract
- 1 cup heavy cream (chilled)
- 1 tablespoon lemon juice (optional, for extra tang)
Ingredient Highlights
- Buttermilk: Adds moisture and a slight tang, contributing to the cake’s tender texture.
- Red Food Coloring: Provides the signature bold red hue without altering the flavor.
- Cream Cheese: Forms the base of the filling, offering rich, creamy texture and a tangy flavor.
- Heavy Cream: Whipped to perfection for the filling, creating a smooth, fluffy texture.
- Cocoa Powder: Gives the cake a subtle chocolate flavor, which complements the tangy filling.
Step-by-Step
 Instructions
Here’s how to make Red Velvet Reinvented:
Prepare the Cake:
- Preheat the Oven: Preheat your oven to 350°F (175°C). Grease and flour two 9-inch round cake pans or line them with parchment paper for easy removal.
- Mix the Dry Ingredients: In a medium bowl, whisk together the flour, sugar, baking powder, baking soda, salt, and cocoa powder.
- Combine Wet Ingredients: In a large bowl, whisk together the vegetable oil, buttermilk, eggs, red food coloring, vanilla extract, and white vinegar until smooth and combined.
- Add Dry Ingredients to Wet: Gradually add the dry ingredients to the wet ingredients, mixing until just combined. Do not overmix.
- Bake the Cake: Divide the batter evenly between the prepared cake pans. Bake for 30-35 minutes, or until a toothpick inserted into the center of the cakes comes out clean. Let the cakes cool in the pans for 10 minutes before transferring to a wire rack to cool completely.
Prepare the Cream Cheese Filling:
- Make the Filling: In a large mixing bowl, beat the softened cream cheese with the powdered sugar and vanilla extract until smooth. If you want a tangier filling, add the lemon juice and mix well.
- Whip the Cream: In a separate chilled bowl, beat the heavy cream until soft peaks form. Fold the whipped cream into the cream cheese mixture until smooth and fluffy.
Assemble the Cake:
- Layer the Cake: Once the cake layers have cooled completely, place one layer on a serving platter. Spread a generous amount of cream cheese filling on top of the first layer.
- Top with the Second Layer: Place the second cake layer on top and press gently. Frost the top and sides of the entire cake with the remaining cream cheese filling.
- Chill the Cake: Refrigerate the cake for at least 30 minutes to set the filling before serving.
Serve and Garnish:
- Garnish (Optional): For added flair, you can garnish the cake with decorative sprinkles, edible flowers, or a light dusting of cocoa powder.
How to Serve
Red Velvet Reinvented can be served in a variety of ways to suit any occasion:
- With a Cup of Coffee or Tea: Pair a slice with your favorite coffee or tea for a comforting afternoon treat.
- For Celebrations: Serve it as the centerpiece dessert at birthdays, anniversaries, or other special occasions.
- As a Dessert Buffet Option: Perfect for a dessert buffet, allowing guests to enjoy a smaller portion of this decadent treat.
- With Fresh Fruit: Serve alongside fresh berries like strawberries or raspberries to balance the richness of the cake.
Additional Tips
Here are some tips to ensure your Red Velvet Reinvented turns out perfectly:
- Use Gel Food Coloring: Gel food coloring provides a more vibrant red color without altering the consistency of the batter.
- Ensure the Cake Cools Completely: Before frosting, make sure the cakes have cooled completely to prevent the filling from melting.
- Chill the Filling: For a fluffier texture, chill the filling for 10-15 minutes before frosting the cake.
- Don’t Overmix the Batter: Mix until just combined to ensure the cake remains light and airy.
- Let the Cake Set: Allow the cake to rest in the fridge for at least 30 minutes before serving to let the filling set properly.
Recipe Variations
Here are 10 variations you can try for Red Velvet Reinvented:
- Red Velvet Cupcakes: Make the cake into cupcakes for a fun, portable twist.
- Red Velvet with Cream Cheese Frosting: For a more traditional red velvet experience, top the cake with a classic cream cheese frosting instead of the filling.
- Chocolate Red Velvet: Add a bit more cocoa powder for a richer chocolate flavor in the cake.
- Vegan Red Velvet Cake: Use plant-based substitutes for the eggs, milk, and cream cheese for a vegan-friendly version.
- Gluten-Free Red Velvet Cake: Substitute the all-purpose flour with a gluten-free flour blend.
- Red Velvet with Whipped Cream Filling: Swap the cream cheese filling for a lighter whipped cream filling for a different texture.
- Lemon Red Velvet Cake: Add lemon zest to the batter and filling for a citrus twist.
- Carrot Red Velvet Cake: Incorporate finely grated carrots into the batter for a unique twist on the classic.
- Red Velvet Cheesecake: Add a layer of cheesecake in the middle for an indulgent, decadent treat.
- Red Velvet with Coconut Filling: Try adding shredded coconut to the filling for extra texture and flavor.
Freezing and Storage
- Freezing: You can freeze the cake layers for up to 2 months. Wrap them tightly in plastic wrap and foil. Thaw in the fridge before assembling the cake.
- Storage: Store leftover cake in the refrigerator, tightly covered, for up to 4 days. The filling may soften slightly after refrigeration, but it will still be delicious.
Special Equipment
Here are some special equipment items to make preparing your Red Velvet Reinvented easier:
- Electric Mixer: A hand or stand mixer will make it easier to cream the ingredients and beat the whipped cream.
- Cake Pans: Two 9-inch round cake pans are ideal for creating even layers.
- Cooling Rack: Helps to cool the cake layers evenly, preventing them from becoming soggy.
- Spatula: A flexible spatula is great for spreading the cream cheese filling evenly over the cake.
- Piping Bag (Optional): For a more decorative finish, you can use a piping bag to apply the filling in a more structured way.
FAQ Section
- Can I use store-bought cream cheese?
Yes, store-bought cream cheese works just as well as homemade, as long as it’s softened to room temperature for easy mixing. - Can I make this cake ahead of time?
Yes, the cake can be made the day before and stored in the refrigerator until you’re ready to serve. - **Can I use a different filling
?**
Yes, feel free to experiment with different fillings such as whipped cream, chocolate ganache, or fruit preserves.
- Can I make this recipe gluten-free?
Yes, you can substitute the all-purpose flour with a gluten-free flour blend for a gluten-free version. - How can I adjust the sweetness of the cake?
If you prefer a less sweet cake, you can reduce the amount of sugar in the cake batter or filling to your taste.
Red Velvet Reinvented

- Prep Time: 30 minutes
- Cook Time: 30-35 minutes
- Total Time: : 2 hours (including cooling time)
Ingredients
For the Cake:
- 2 ½ cups all-purpose flour
- 1 ½ cups granulated sugar
- 2 teaspoons baking powder
- 1 teaspoon baking soda
- 1 teaspoon salt
- 1 tablespoon unsweetened cocoa powder
- 1 ½ cups vegetable oil
- 1 cup buttermilk (or substitute with milk + 1 tablespoon vinegar)
- 2 large eggs
- 2 tablespoons red food coloring (gel or liquid)
- 1 teaspoon vanilla extract
- 1 teaspoon white vinegar
For the Cream Cheese Filling:
- 8 oz cream cheese, softened
- 1 cup powdered sugar
- 1 teaspoon vanilla extract
- 1 cup heavy cream (chilled)
- 1 tablespoon lemon juice (optional, for extra tang)
Instructions
Prepare the Cake:
- Preheat the Oven: Preheat your oven to 350°F (175°C). Grease and flour two 9-inch round cake pans or line them with parchment paper for easy removal.
- Mix the Dry Ingredients: In a medium bowl, whisk together the flour, sugar, baking powder, baking soda, salt, and cocoa powder.
- Combine Wet Ingredients: In a large bowl, whisk together the vegetable oil, buttermilk, eggs, red food coloring, vanilla extract, and white vinegar until smooth and combined.
- Add Dry Ingredients to Wet: Gradually add the dry ingredients to the wet ingredients, mixing until just combined. Do not overmix.
- Bake the Cake: Divide the batter evenly between the prepared cake pans. Bake for 30-35 minutes, or until a toothpick inserted into the center of the cakes comes out clean. Let the cakes cool in the pans for 10 minutes before transferring to a wire rack to cool completely.
Prepare the Cream Cheese Filling:
- Make the Filling: In a large mixing bowl, beat the softened cream cheese with the powdered sugar and vanilla extract until smooth. If you want a tangier filling, add the lemon juice and mix well.
- Whip the Cream: In a separate chilled bowl, beat the heavy cream until soft peaks form. Fold the whipped cream into the cream cheese mixture until smooth and fluffy.
Assemble the Cake:
- Layer the Cake: Once the cake layers have cooled completely, place one layer on a serving platter. Spread a generous amount of cream cheese filling on top of the first layer.
- Top with the Second Layer: Place the second cake layer on top and press gently. Frost the top and sides of the entire cake with the remaining cream cheese filling.
- Chill the Cake: Refrigerate the cake for at least 30 minutes to set the filling before serving.
Serve and Garnish:
- Garnish (Optional): For added flair, you can garnish the cake with decorative sprinkles, edible flowers, or a light dusting of cocoa powder.
Nutrition
- Serving Size: 12 servings
- Calories: 350-400
- Fat: 20g
- Carbohydrates: 45g
- Protein: 5g
Conclusion
Red Velvet Reinvented is a delicious and visually stunning dessert that’s perfect for any occasion. With its rich cocoa flavor, creamy filling, and vibrant red hue, it’s sure to impress guests and satisfy your sweet tooth. Whether layered in a classic cake, served as cupcakes, or transformed into a decadent dessert jar, this treat is as versatile as it is irresistible.
The balance between the mild cocoa flavor and the smooth, tangy cream cheese frosting creates the perfect bite every time. Plus, with its striking red color, this dessert is a showstopper at birthdays, anniversaries, and holiday gatherings.
This recipe offers endless opportunities for experimentation, whether you want to add a twist with chocolate chips, different frosting flavors, or a sprinkle of gold dust for an extra touch of glamour.
I’d love to see your Red Velvet Reinvented creations! Snap a photo, share it on social media, and tag me so I can admire your beautiful dessert. Happy baking!