
Discover the Kitchen Tool Everyone Is Raving About!
- • Precision Engineered: Sharp blade with durable craftsmanship.
- • Comfort First: Ergonomic design for effortless slicing.
- • Stylish & Strong: Elegant wood handle meets stainless steel strength.
- • Risk-Free Pick: Thousands of happy home chefs can’t be wrong.
- • Today’s Deal: Just $29.95 instead of $99.85 — limited-time offer!
This post may include affiliate links — learn more here .
Introduction
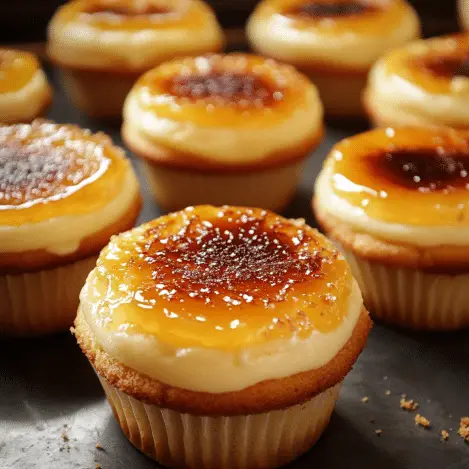
Crème Brûlée Cheesecake Cupcakes combine the best of two classic desserts: the creamy richness of cheesecake and the caramelized sugar topping of crème brûlée. These delightful cupcakes offer individual portions of indulgence, perfect for any occasion. The velvety cheesecake filling is baked into cupcake liners and topped with a golden, crackling layer of caramelized sugar for a show-stopping dessert.
I remember the first time I made these for a dinner party. The oohs and ahhs as guests cracked through the caramelized sugar topping were priceless. What makes these cupcakes so special is their versatility—you can keep them simple and classic or add a touch of flair with flavors like vanilla bean, citrus zest, or even a hint of espresso. The balance of textures, from the creamy cheesecake to the crisp caramelized sugar, makes every bite unforgettable.
These cupcakes are surprisingly easy to make, too. With just a few ingredients like cream cheese, sugar, and eggs, you can create a luxurious treat that feels like it came straight from a fancy bakery. A kitchen torch is key for achieving that perfect brûlée topping, but the effort is well worth it. Whether you’re hosting a celebration or indulging in a sweet treat for yourself, Crème Brûlée Cheesecake Cupcakes are guaranteed to impress!
Perfect for:
- Elegant dinner parties
- Birthdays
- Afternoon tea
- Special celebrations
- Dessert trays
Why You’ll Love This Recipe
Here’s why Crème Brûlée Cheesecake Cupcakes will become a favorite:
- Creamy Cheesecake Base: A rich and velvety filling forms the heart of these cupcakes.
- Signature Crème Brûlée Topping: A caramelized sugar layer provides the iconic crackling finish.
- Perfect Portions: Individual servings make these cupcakes easy to serve.
- Versatile: These cupcakes can be dressed up for formal occasions or enjoyed as a casual treat.
- No Special Pans Needed: Made in a standard muffin tin, no ramekins are required.
Preparation and Cooking Time
- Total Time: 4 hours (including chilling time)
- Preparation Time: 25 minutes
- Baking Time: 20-25 minutes
- Chilling Time: 3 hours
- Servings: 12 cupcakes
- Calories per serving: Approximately 230-280 calories
- Key Nutrients: Protein: 5g, Carbs: 25g, Fat: 17g
Ingredients
For the Crust:
- 1 cup graham cracker crumbs
- 2 tablespoons granulated sugar
- ¼ cup unsalted butter, melted
For the Cheesecake Filling:
- 16 oz cream cheese, softened
- ½ cup granulated sugar
- 2 large eggs
- 1 teaspoon vanilla extract
- ¼ cup heavy cream
For the Crème Brûlée Topping:
- 3-4 tablespoons granulated sugar
Ingredient Highlights
- Cream Cheese: Creates the creamy, luscious cheesecake texture.
- Heavy Cream: Adds richness and smoothness to the filling.
- Graham Cracker Crumbs: Provide a buttery, slightly crunchy base.
- Sugar for Topping: Caramelizes beautifully to form the crackling crème brûlée layer.
Step-by-Step
 Instructions
Prepare the Crust:
- Mix the Crust Ingredients: In a small bowl, combine the graham cracker crumbs, sugar, and melted butter. Stir until the mixture resembles wet sand.
- Fill the Cupcake Liners: Line a 12-cup muffin tin with cupcake liners. Press about 1 tablespoon of the crumb mixture into the bottom of each liner, pressing firmly with the back of a spoon or your fingers.
- Chill the Crusts: Place the muffin tin in the refrigerator while preparing the filling.
Prepare the Cheesecake Filling:
- Mix the Cream Cheese and Sugar: In a large mixing bowl, beat the softened cream cheese and granulated sugar with an electric mixer until smooth and creamy.
- Add the Eggs: Beat in the eggs one at a time, ensuring each is fully incorporated before adding the next.
- Add Vanilla and Cream: Stir in the vanilla extract and heavy cream, mixing until smooth and combined.
Assemble and Bake:
- Fill the Cupcake Liners: Remove the chilled crusts from the refrigerator and divide the cheesecake filling evenly among the liners, filling each about ¾ full.
- Bake the Cheesecakes: Preheat the oven to 325°F (160°C). Bake the cheesecakes for 20-25 minutes, or until the centers are set but slightly jiggly.
- Cool and Chill: Allow the cupcakes to cool at room temperature, then refrigerate for at least 3 hours, or until fully chilled and set.
Add the Crème Brûlée Topping:
- Sprinkle Sugar on Top: Just before serving, remove the cupcake liners and sprinkle about ½ teaspoon of granulated sugar evenly over the top of each cheesecake.
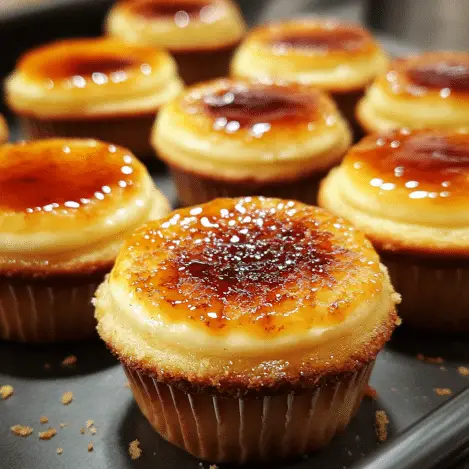
- Caramelize the Sugar: Use a kitchen torch to melt and caramelize the sugar until it forms a golden, crackling crust. Allow the topping to cool for a minute before serving.
How to Serve
- With Fresh Fruit: Pair with raspberries, strawberries, or blueberries for a refreshing contrast.
- As an Elegant Dessert: Serve on a dessert platter for a special occasion.
- For Casual Enjoyment: Enjoy chilled directly from the fridge.
- With Whipped Cream: Add a dollop of fresh whipped cream for extra indulgence.
Additional Tips
- Soften the cream cheese for a smooth filling.
- Use a steady hand with the torch for an even caramelized topping.
- Make sure the cheesecakes are thoroughly chilled before adding the sugar topping.
- For an extra crisp crust, bake the crusts for 5 minutes before adding the filling.
Recipe Variations
- Vanilla Bean Crème Brûlée Cheesecake Cupcakes – Add vanilla bean paste for a speckled, aromatic filling.
- Chocolate Crème Brûlée Cheesecake Cupcakes – Mix melted chocolate into the filling.
- Matcha Crème Brûlée Cheesecake Cupcakes – Add matcha powder to the filling for a green tea twist.
- Lemon Crème Brûlée Cheesecake Cupcakes – Add lemon zest and juice for a tangy variation.
- Coconut Crème Brûlée Cheesecake Cupcakes – Add shredded coconut to the crust and toasted coconut on top.
Freezing and Storage
- Freezing: Freeze the cheesecakes without the topping for up to 2 months. Thaw and add the caramelized sugar topping before serving.
- Storage: Store in an airtight container in the refrigerator for up to 5 days.
Special Equipment
- Muffin tin with liners
- Electric mixer
- Kitchen torch for caramelizing the sugar
FAQ Section
- Can I use a broiler instead of a torch? Yes, but watch carefully to avoid burning.
- Can I make these in advance? Absolutely! Prepare up to 2 days ahead and caramelize the sugar just before serving.
- Can I skip the crust? Yes, bake the cheesecake filling directly in the liners.
- What if I don’t have heavy cream? Substitute with whole milk, though the texture may be slightly lighter.
- Can I make this recipe gluten-free? Use gluten-free graham crackers for the crust.
Conclusion
Delight your taste buds with the luxurious fusion of cheesecake and crème brûlée in these Crème Brûlée Cheesecake Cupcakes. With their creamy cheesecake base and caramelized sugar topping, these perfectly portioned desserts are irresistibly elegant and delicious. Each bite delivers the smooth richness of cheesecake paired with the satisfying crunch of brûléed sugar, making them a true crowd-pleaser.
These cupcakes are as easy to prepare as they are stunning, making them perfect for everything from intimate gatherings to festive celebrations. Whether you’re indulging in them yourself or sharing with loved ones, these Crème Brûlée Cheesecake Cupcakes bring joy to every occasion.
I’d love to see how your Crème Brûlée Cheesecake Cupcakes turn out! Snap a photo, share it on social media, and don’t forget to tag me—I can’t wait to see your beautiful creations. Happy baking!